

It’s almost February, and you know what that means… time to start planning for the month ahead! The planner I’m currently using doesn’t haves the dates printed, so going through and stamping the numbers, month, and year is a fun way to acknowledge the end of one month and the beginning of the next.
I also like to decorate the monthly spread at the beginning of each month. Having a month-at-a-view spread is a great way to get the big-picture events and tasks of the month, and it makes week-to-week planning a little easier when you’ve got the major points already written down.
So, here’s February’s spread!

click image for a closer look!
For my February Planner Pages, I wanted to use a lot of reds and pinks, but then I also worked some bright yellows and greens in too. Playing with color is one of the best parts of planning – and if it doesn’t work out, you don’t have to look at it for very long!
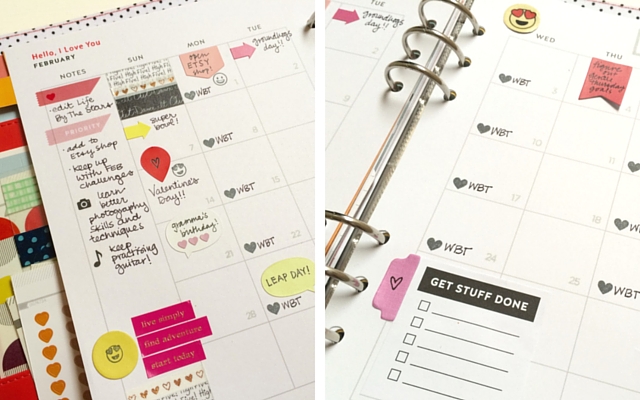
I used a pretty even balance of stickers, stamps, sticky notes, and washi this month. With so many blank days this month, I also got the chance to experiment with layering washi tape and using sticky notes to create eye-catching to-dos like the “Get Stuff Done” note. For stamps, I used a small heart icon to designate posting days, a star icon for BrightMail days, and then I used my small emoji stamps and a roller phrase stamp for decoration.
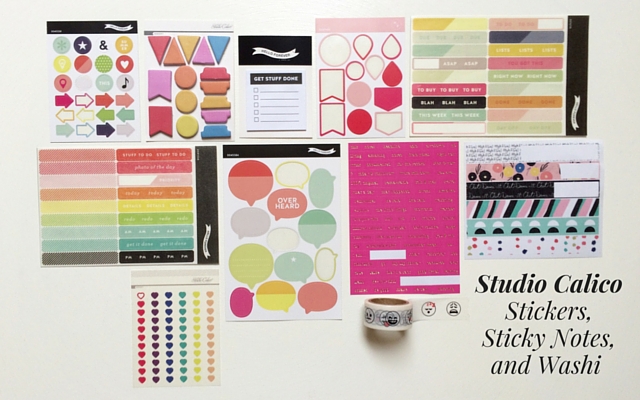
As you can see, I used QUITE a few different sheets of stickers, sticky notes, and washi strips to decorate this month. I think this was because I knew the color scheme I wanted, and was looking for pinks and reds on whatever sheet I could find. Everything in the photo above is from Studio Calico, mostly from their monthly Planner Subscription Kits. You can find the gorgeous washi strips here, designed by one of my favorite local artists!
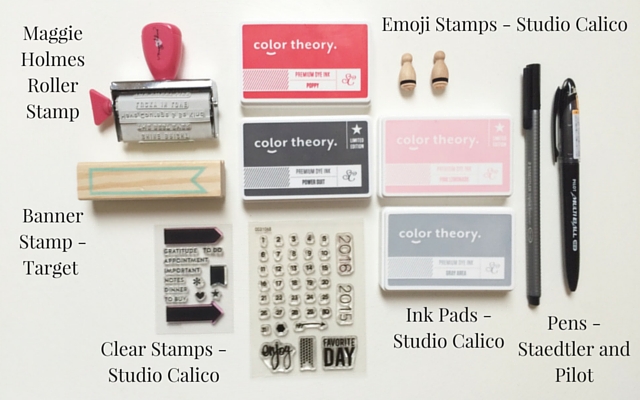
As mentioned before, the planner I’m using doesn’t come with dates, so I love using this Heidi Swapp Set with the Gray Area Stamp Pad to stamp all the dates in before I start decorating. I also used the 2016 stamp from that set and the banner stamp from the Target One Spot to create a header for the right page. A lot of these items were mentioned in my last post, How To Create A Rubber Stamp Starter Kit, so be sure to check out that post if you’re interested in my favorite stamps & stamping supplies.
Quite a few days are still left completely blank, and I’m okay with that. I’m sure as the month goes on, I’ll find more things to do and places to go and people to see. It’s just as much fun to fill in those things as I go, or even fill them in at the end of the month.
That’s it for today’s post! I hope you enjoyed this up-close look at my February Planner Pages.

If you feel inspired to decorate your calendar or planner this month, I’d love to see it! Tag me @haleympettit on Instagram or Twitter, or leave a link in the comments.


