

Bonjour Planner Babes!
It’s been a while since I shared a planner-related post, but that’s all about to change! I got into a bit of planner-blog rut, thinking, “No one cares what your planner looks like, Haley!” But, I think I was lying to myself a bit. One of my favorite things to do at planner meet-ups or other crafty gatherings is to see what everyone else is up to, what supplies they’re loving, what techniques they’re using, etc. Others may call it “snooping”, but I call it gathering inspiration.
And so, I want to share more planner posts here on WBT in 2017. Some might just be snapshots of weekly spreads, some might be more informative, technique-based posts… like this one! If you’re into planning, I hope you’ll check back to see more planner girl content just for you. (And if you can’t wait that long, check out the Planner Archive here!)
In this post, I’ll be sharing Three Simple Steps to Planner Pocket Perfection. I recently found myself in desperate need of a planner pocket makeover, and it was a bigger task than I imagined! Starting to fill up an empty secretarial pocket (fancy name, I know!) can be overwhelming, and I didn’t know where to begin.
But soon enough – after a lot of rearranging – I learned what worked, what made me smile when I opened up my planner to get to work. So let’s just jump right in!
PSST! Click on the photos for a better snoop view 🙂
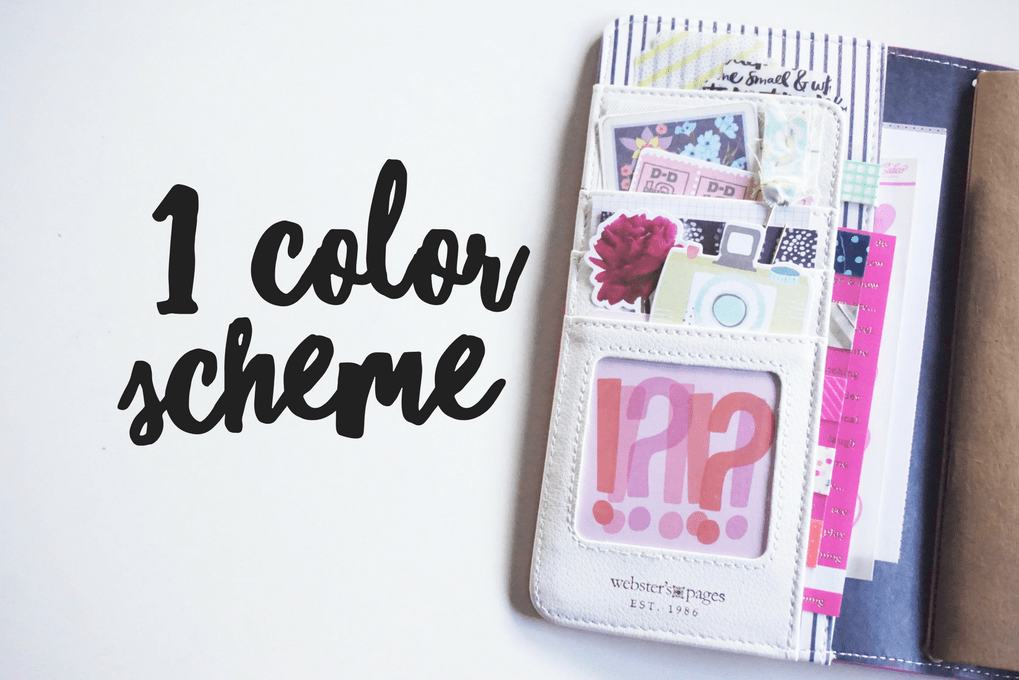
Step One: Color Scheme
Starting with the color of your planner itself, you’ll want to find supplies that incorporate or complement that color. Try to stick to a main color scheme of 3-4 colors for the best look. However, little pops of other colors can really make your pockets stand out. Contrast is your friend here: choose different hues, tints, and shades to get a dynamic style.
My Webster’s Pages Travelers Notebook is hot pink (exterior), navy blue, and white. So while the inside is pretty neutral, I still wanted the pocket to coordinate with the outside cover. I started with the journaling card in the pocket, which brought in some coral red and light pink too. From there, I pulled in pieces that would go (navy blue journaling card, pink word stickers) and pieces that would contrast (the bright green camera die cut, the pastel fabric clip, and the deep pink flower die cut).
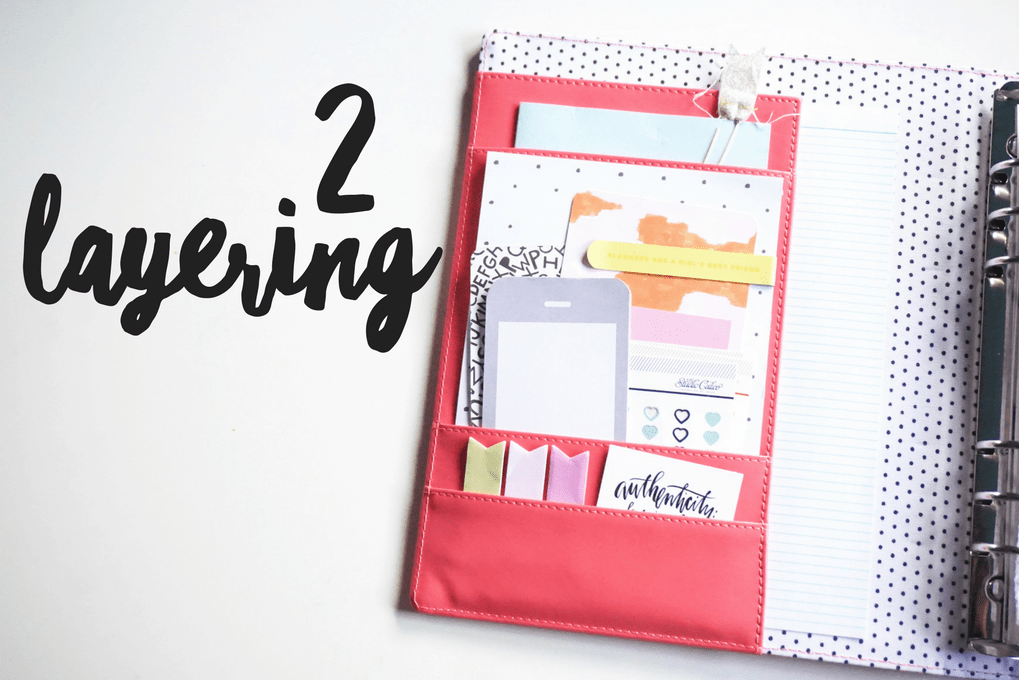
Step Two: Layering
Because of the very nature of planner pockets, layering is a must! Don’t be afraid to layer different items on top of each other to create depth and interest. Even if you have a large pocket, you can layer a bunch of items from taller pieces (in the back) to shorter pieces (in the front). Using clips is also a great way to add layers – you can make certain pieces pop by adding a planner clip!
In my Hello Forever Planner, I’ve often struggled with larger middle pocket. However, by simply layering some larger note paper in the back, I had a great canvas to “build” the rest of my pocket on. I keep a perpetual calendar in the back pocket, with a little clip to easily open to the current month. Your pockets can totally be functional and pretty!
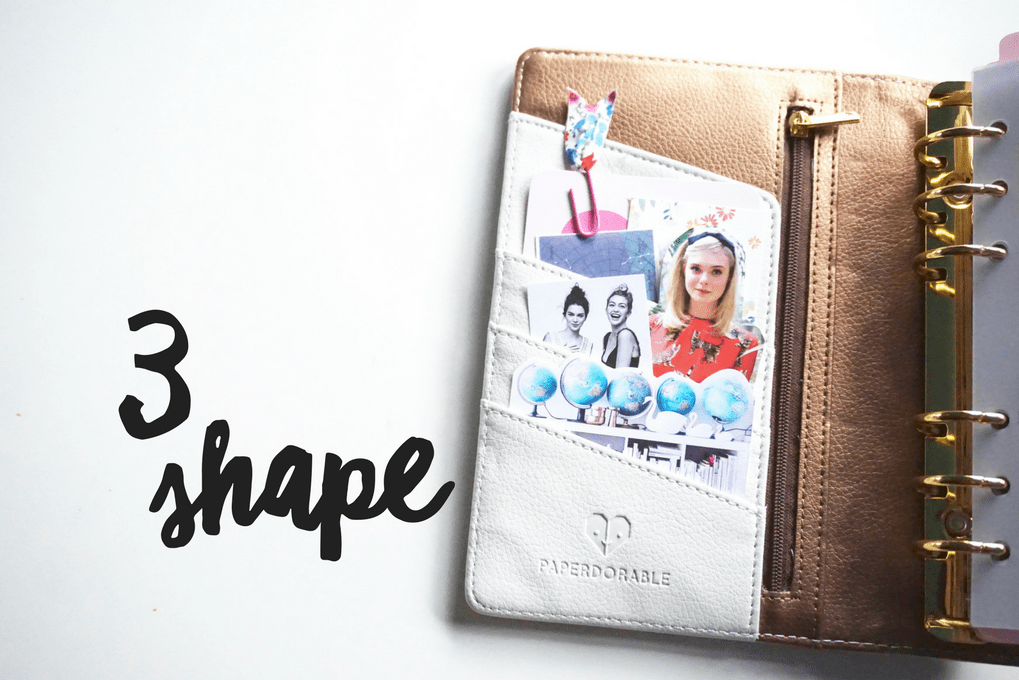
Step Three: Shape
Between color and layering, you’re already on your way to planner pocket perfection! Step number three is to use pieces with interesting shape. Layering a bunch of rectangular sticker sheets directly on top of one another is going to be pretty boring. Add magazine clippings, die cuts, and planner clips to create interest and give your planner personality. And if you do have a bunch of rectangular pieces, put them at different angles!
The pockets in my Paperdorable Dream Planner are pretty simple. But, because the color, layering, and shape of the decor are all interesting, I think it’s perfect. I trimmed around an image I printed out from Pinterest and a clipping from a fashion magazine to create interesting shape. The rounded corners on the journaling card also contrast the sharp edges of the two pieces in front of it. They’re little details, but they make a difference!
Voila! Planner Pocket Perfection.
Of course, everyone’s Planner Pocket Perfection is going to look a bit different. Some enjoy a variety of planner clips, while others will go with a bunch of die cuts! As always, I hope you use these tips to make your planner perfect for you. With a little trial and error, you’ll find your personal style in no time.
Down below, I’ve included a few photos showing what specifically I keep in each planner. Because my different planners are different in purpose, their pockets hold a different assortment of things! Make a list of your most-used supplies in your planner, and see if you can work them into your pockets for on-the-go planning!


*Tip: wrap your favorite washi tapes around a gift card or piece of acetate for a slim, portable washi collection!
And that’s it!
Thanks for reading. I hope this post gave you some ideas for decorating your planner pockets! Now that I’ve solved the mystery of what makes a planner pocket inspiring and functional for me, I’m sure I’ll want to redecorate them all the time. #sorrynotsorry
Until next time!

What’s your number one must-have item in your planner pockets? Share in the comments!


6 Comments
Melissa
I really need to start a great planner! And stick to it! Thank you for the post! must pin!
January 23, 2017 at 8:39 amHaley
Planning is so fun! It’s a great way to stay organized and express your creativity. Thanks for commenting!
January 23, 2017 at 8:47 amxo, Haley
Brandi
I love seeing how others organize and decorate their planners! Thanks for sharing.
January 23, 2017 at 8:41 amHaley
Thanks for commenting Brandi! I also love to see how others make their planners work for them.
January 23, 2017 at 8:46 amxo, Haley
Anna
I love this idea! I could definitely utilize the unused space on the inside flap of my planner! I also like the idea of having a fun shape instead of just squares on squares.
January 23, 2017 at 11:22 amHaley
Totally! Planner pockets are built in storage for all your planning essentials. And even if your planner doesn’t have pockets, you can utilize the inside cover by attaching sticky notes, or clipping in some stickers and note paper with a paper clip! Thanks for commenting <3
January 23, 2017 at 11:34 amxo, Haley